You want a clear view on the advantages of playing three at the back and how it can change your football team’s control on the pitch.
Top coaches like Conte, Southgate, Tuchel, Alonso, and Gasperini show how this formation can shift into a five when defending and expand into overloads when attacking.
This shape gives central stability, flexible pressing, and fast transitions.
Wing-backs supply width while coordinated runs cover dangerous positions and keep strikers tracked. The elasticity principle — drop when space opens, step up when covered — helps balance risk and reward in matches.
Read on to see how this formation adapts in real games and what questions you should ask when choosing a setup for your squad.
Key Takeaways
- The three-at-the-back setup offers central control and varied build-up options.
- Elite coaches use it to morph shape between five and three during phases.
- Wing-backs provide width and pace for rapid transitions.
- Coordinated tracking runs and elastic movement reduce counter risks.
- Understand positions and roles before asking players to adopt this formation.
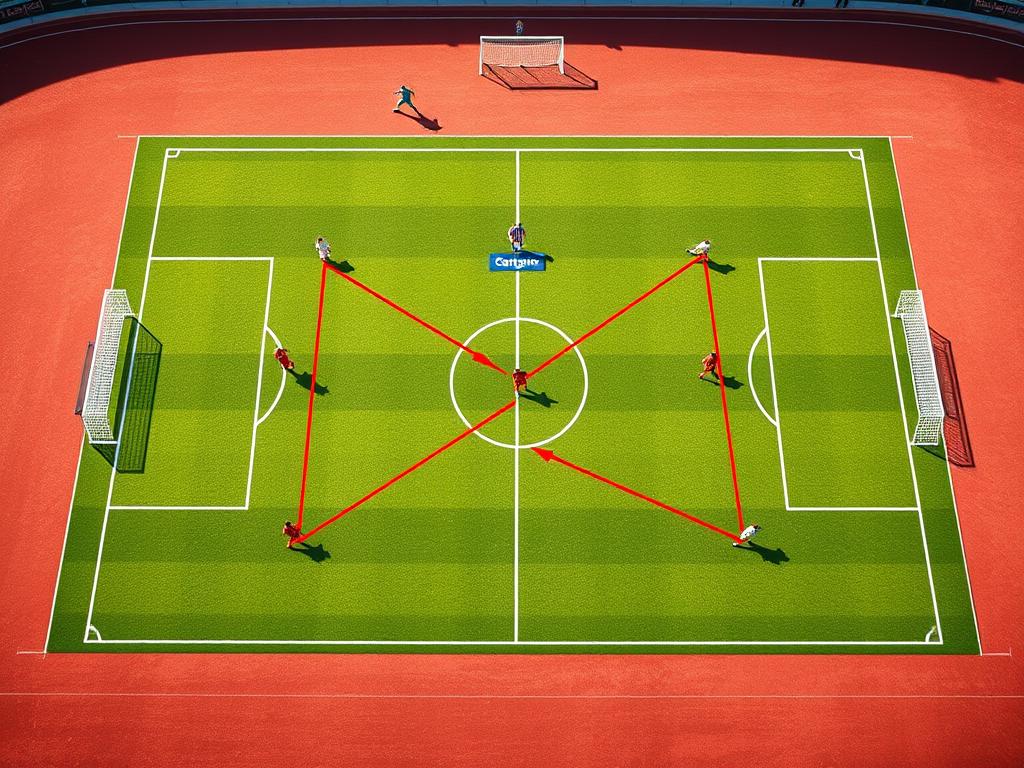
What a back three really is today — and how it differs from a back four
Let’s unpack how a back three reshapes spacing, width, and defensive lines. In practice, three centre-backs form the spine while wing-backs supply wide outlets and hold width in attack.
3-5-2 centers on a midfield trio and two strikers. Wing-backs push high but can drop to create a 5-3-2 when under pressure. England used a version at the 2018 World Cup with Maguire, Stones, and Walker and Henderson as a single pivot.
3-4-3 swaps a stronger front line for creativity. Two wing-backs support a double pivot while a front three gives pressing variety. That shape often becomes a 5-4-1 or 5-2-3 out of possession to block crosses.
Compared with a back four, the back three lets one defender step out without leaving central gaps versus one or two strikers. A back four keeps straighter lines and simpler spacing, but it can lose central numbers when a centre-back moves forward.
- Who steps and who covers? Wide centre-backs tuck inside; wing-backs recover wide.
- Why morph to a back five? To protect flanks, control crossing lanes, and stabilize deep spaces.
Advantages of playing three at the back
Can a defensive formation actually unlock more attacking options? A back three often does exactly that. It gives you central security while allowing one defender to step out and engage play without risking the spine.

Central security
Three central defenders protect lines so a partner can press a creator or cut passing lanes. You gain cover for the goalkeeper and clear zones for midfield to press higher.
Pressing and elasticity
The elasticity rule is simple: drop to deny depth when the ball is uncovered; squeeze the field and raise the line when covered. That makes a coordinated high press less reckless.
Build-up variety
Wide center-backs can drive into midfield, split lines, or switch play. This creates overloads and opens central spaces for strikers and creative mids.
- Wing-backs stretch opposition, creating width and forcing defensive shifts.
- Quick transitions follow naturally from a stable last line—wing players can sprint into channels for counters.
Want deeper context on formation choices and transitions? Compare how shapes differ in a 4-3-3 formation to refine your tactical plan.
The drawbacks coaches must weigh with a back three
Every system has costs — and a back three brings distinct weaknesses to consider. Counterattacks tend to target wide areas because a trio covers less lateral ground than a four. That forces wing-backs to sprint back and form a five when under pressure.
Who carries the load? Wing-backs do both roles: defensively offensively they must join attacks then recover quickly. That doubles their running and raises cognitive demands in split-second situations.
Turnovers hurt, too. If you lose the ball with just two in midfield, opposition teams can overload the vacated midfield space and drive fast counters into channels.
Key risks and practical fixes
- Wide areas are vulnerable when wing-backs fail to recover — timing and start positions matter.
- Heavy load on wing-backs demands rotation, fitness plans, and clear decision rules for players.
- Midfield overloads after turnovers require pressing triggers and quick defensive cover.
- Morphing to a back five can stop quick attacks and sap creativity; balance rest-defense with forward intent.
- Simple fixes: rest positions, clearer lines for recovery, and rehearsed responses for chaotic play.
Back three vs back four: tactical trade-offs and matchups
Matchups often force a coach to choose coverage across the pitch over central depth. Which setup fits your squad depends on who you face and where they hurt you.
When a back four’s balanced coverage beats central depth
A back four shines versus a wide front three or teams that attack with pace on the flanks. Full-backs take 1v1s and make recovery runs. That simple structure gives clear roles and less defensive chaos.
Handling different opposition shapes
If the opposition uses a lone striker, a back three gives you a spare centre to step and intercept lanes without opening gaps. Versus two strikers you keep a free man in the defensive line to manage breaks and start presses.
Against a wide front three, many coaches switch to a back four or a 4-3-3 to control width and match wing movements. Reading shape early wins you seconds to adjust positioning and who marks whom.

| Scenario | Best fit | Key trade-off |
|---|---|---|
| Wide front three | back four | Superior width control, simpler full-back matchups |
| Lone striker | back three | Extra central cover; freer stepping into midfield |
| Two strikers | back three | One spare to manage runs and press build-up |
| Fast wingers across pitch | back four | Cleaner recovery runs and marked channels |
- Which teams you face matters; adjust early.
- Watch wing runs and underlaps; they expose spacing.
- Decide who marks whom before kickoff to keep shape under pressure.
Implementing the system: roles, coaching cues, and training focus
Turn roles into routines so your unit reacts the same way under pressure. Start by naming responsibilities for each position. Clear roles cut hesitation and speed decision-making on the ball.
How should the central defender lead? That player must read the game, organize teammates, and start play with both feet. Teach scanning, concise calls, and progressive passing in small drills.
The two wide center-backs need 1v1 strength and the confidence to step into midfield. Practice driving through lines, quick recoveries, and short combos with midfielders to keep possession.
Wing-backs have dual jobs: time overlaps or underlaps and drop to form a five when needed. Rehearse triggers so wing-backs know when to push forward and when to tuck in to block counters.
- Session focus: staggered lines, quick transitions, and repeatable runs.
- Drills: 4v4 to 6v6 to hardwire spacing, pressing traps, and elastic movement.
- Coaching cue: “step on covered ball” and “drop on uncovered ball” for synced reactions.
Conclusion
Want a quick verdict on why a back three can reshape your team’s control and attack patterns?
When roles are clear and drills mirror match situations, this formation gives central cover and room to push forward with speed. Coaches from Conte to national sides show how wing-backs and synced defenders make quick transitions work.
Matchups matter. Use a back four when width is under threat, then switch when you need extra central cover and sharper attacks. Train triggers, communication, and recovery runs so players react the same way under pressure.
Final thought: pick the formation that fits your squad, rehearse the details, and turn this feature into consistent results on the pitch. Learn more about positions in our soccer positions explained guide.