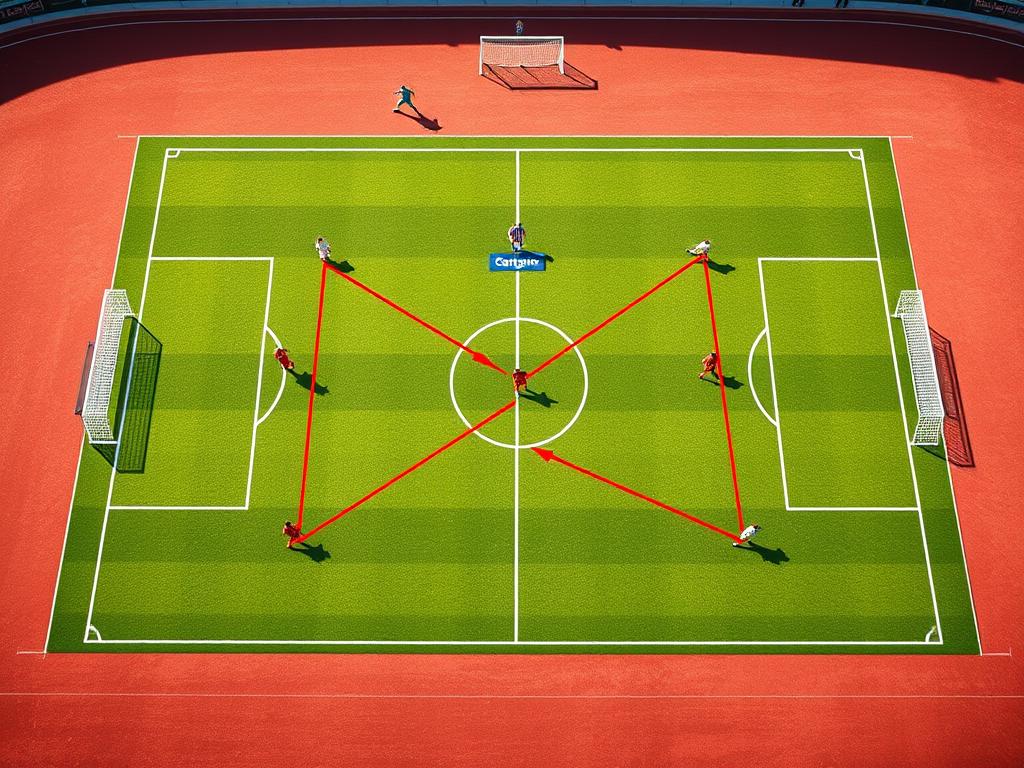
You want to actually see how zonal marking works on the field and why so many teams trust this approach, and this guide gives that clarity fast.
Think of it as a team strategy where players guard space instead of chasing one opponent. That shift cuts confusion in the penalty area and helps coaches shape a compact defense that adapts in real time.
Expect clear examples, simple language, and practical coaching tips you can spot while watching matches. We’ll cover set pieces, open-play structure, and the hybrid tweaks top clubs use.
By the end you’ll know how teams limit opposition threats, how players align to zones, and why the approach fits modern tactics in the beautiful game.
Key Takeaways
- Zonal marking focuses on space control rather than individual tracking.
- It reduces chaos inside the penalty area and improves team shape.
- Coaches adapt the system to squad strengths and opposition threats.
- You’ll spot key cues in set pieces and open play that reveal the approach.
- Simple drills and setup tips make the tactic usable for youth teams.
What Is Zonal Marking? A Clear, Game-Day Definition
Imagine a defensive map where each player covers a patch of turf. That map sets priorities the second the ball moves. It is a system that values space over tracking one opponent.
How it shapes play: defenders keep short distances between each other to stay compact. They shift as a block, delaying penetration and forcing attackers wide.
- You defend a zone, not a man; you engage when the ball enters your area.
- Compared with man marking, this reduces gaps created when a defender is dragged out of position.
- Teams may still step out to mark opposition threats, but within the zonal framework.
| Reference Point | Primary Action | Match Impact |
|---|---|---|
| Ball | Shift the block toward the ball | Fewer through-balls in central lanes |
| Opposition | Prioritize key threats inside zones | Selective stepping reduces 1v1 risks |
| Space & Teammates | Maintain compact distances | Less room for fast runs behind the line |
Why do teams choose this approach? It protects dangerous areas and keeps lines tight. The trade-off is that attackers can build momentum, so timing your first contact matters.
From Brazil to the Modern Game: Origins and Evolution
How did a tactical tweak in 1950s Brazil change defensive play for decades? The short answer: a simple shift in shape that focused on space and team movement.
Zezé Moreira made a bold call at Fluminense. He moved away from the W‑M man system and converted a back three into a zonal back four. That one change improved compactness and reduced risky chasing in the box.
Early innovators and tactical consolidation
Rinus Michels taught teams to move as a block. Then Arrigo Sacchi added structure. Sacchi formalized four reference points—ball, opposition, teammates, space—that guide every position and step.
- Zezé Moreira’s switch solved a speed and spacing problem in open play.
- Michels stressed collective pressing and compactness.
- Arrigo Sacchi gave coaches a repeatable system for timing and alignment.
| Coach | Change | Impact on the game |
|---|---|---|
| Zezé Moreira | Back three → flat back four | Better compactness; fewer lost positions |
| Rinus Michels | Collective pressing and block | Improved team shifts and recovery |
| Arrigo Sacchi | Reference points for defense | Clear timing and coordinated responses |
Over time elite leagues, especially the Premier League, adopted these ideas. The result? Modern sides defend as units, deny central routes, and react to the ball with purpose. Small tweaks in position and timing now decide outcomes.
The Four Reference Points: Ball, Opposition, Teammates, and Space
Which single idea keeps a whole defense moving as one: four shared reference points that guide every step. Pick the lead point and your team makes fewer mistakes. Simple decisions create coordinated micro-movements that beat confusion.
Ball-oriented adjustments and anticipation demands
A ball-focused approach means the block shifts toward the ball. Players must talk and read the play so a late step does not open a lane.
Space-first compactness to deny overloads
Choose space as the priority and you protect key areas. You may give up non-dangerous turf to stop an overload near goal.
Opposition-focused tweaks within a zonal structure
Sometimes one player jumps to a danger man while the rest hold the block. That mix keeps flexibility without chaos.
Teammate spacing: vertical and horizontal compactness
Keep tight distances both across and between lines. Good spacing frustrates through-balls and third-man runs.
- Arrigo Sacchi nailed the point: clear reference points stop freelancing.
- Your strategy can shift by phase—short build-up needs ball focus; late defending favors space-first protection.
| Reference Point | Primary Action | Why it works |
|---|---|---|
| Ball | Shift block toward play | Reduces central penetration |
| Opposition | Jump to key threats | Neutralizes aerial or roaming players |
| Space | Compact zones | Denies overloads near goal |
Building the Block in Open Play
See the small shifts that add up to great defensive control on the pitch. In open play, the goal is simple: delay and frustrate the opposition while you hunt for a counter.
Distances, shifting laterally and vertically across the pitch
Keep short gaps between players. The block moves as one—two steps left, a five‑yard drop, then a squeeze up as the ball swings back.
Why it works: close distances stop a single pass from feeding an opponent between the lines.
Forcing play wide and delaying penetration
Angle your body to show the flank. Delay the attack and wait for support to arrive. Small movements beat big lunges.
Transition moments: regains, counter-attacks, and outlets
On a regain, the nearest player secures the ball. A far-side outlet sprints into space and your counter starts in two passes.
- Picture a living block sliding across the pitch to deny central lanes.
- Practice reads and triggers so you shift on time without leaving gaps.
- Against a quick opponent, discipline to stay compact beats getting pulled out.
| Situation | Primary Action | Result |
|---|---|---|
| Ball on flank | Show wide, delay | Less central penetration |
| Central switch | Drop and squeeze | Passes become predictable |
| Recover possession | Secure + outlet run | Fast two-pass counter |
Defending Set Pieces with Zonal Responsibility
Corners and free kicks are pressure tests. If you lose shape here, one delivery creates huge chances.
Corner-kick setups often split into two clear units: a higher line to block attacking runs and a deeper first-contact unit to win headers inside the six-yard area.
Central lanes get priority. Cover the width of the six-yard box and assign near-post recovery duties when the ball clears a player and heads for the goalline.
Free-kick lines and second phases
On direct free kicks, keep a tight stepping line. Players must be side-on to see the ball, step as one to control the offside point, and then attack the delivery.
Second-phase compactness is non-negotiable. One or two players should patrol the penalty area edge to chase loose balls and start counters. That role suits those less dominant in the air but quick on the ground.
- Fixed positions reduce confusion at contact.
- Defenders focus on the ball’s flight, not constant tracking.
- Practice these roles often; a single misstep creates a clear scoring chance.
| Situation | Primary Action | Result |
|---|---|---|
| Corner: high delivery | Deep unit attack first contact | Less second-phase scramble |
| Corner: outswing/cut-back | Higher blockers disrupt runs | Fewer free headers |
| Free kick | Step as one; side-on shape | Controlled offside line |
Hybrid Approaches: Mixing Zonal and Man Marking
A hybrid approach gives coaches a toolkit: hold the line and neutralize the big target. Many teams marry zonal marking with personal assignments so they keep structure while stopping a key threat. This strategy keeps the penalty area organised and makes set pieces harder to exploit.

Premier League examples and tailored assignments
Think of Tuchel’s Chelsea. Tall players occupied prime zones near the six-yard line while a trusted defender shadowed the main aerial threat. That mix limited Virgil van Dijk’s impact in a high-profile clash and shows how the system can work in the premier league.
Inter Miami’s hybrid lines
Inter Miami use a similar split. Some players hold zonal responsibilities while others take a direct opponent into tight contact. The result? Zones stay covered and the chief header gets less clean space to attack the ball.
When to go man-for-man vs protect zones
- Use man-for-man vs elite headers or clever blockers; stop uncontested leaps in the penalty area.
- Protect zones when deliveries vary or runs crowd the box; block lanes to the ball instead of tracking every runner.
- Balance is key: using zonal anchors plus a few man assignments often neutralizes rehearsed routines.
Coaches, Systems, and Real-World Case Studies
Want to learn how elite coaches turn simple principles into match‑winning defense? Look at these case studies. They show how a coach adapts space, roles, and timing to suit players and opposition.
Diego Simeone — low block and narrow wide midfielders
Simeone’s Atlético use a compact 4-4-2 block. Forwards screen pivots. Wide midfielders tuck in to close inside channels.
The back four slides to funnel play wide and protect the centre of the pitch.
José Mourinho — zonal back line with a double pivot
Mourinho pairs a zonal line with a screening double pivot. Midfielders time a press and block central passes.
This gives the back line space to hold shape and strike at the right time.
Antonio Conte — back five with opposition-focused jumps
Conte’s system adds targeted jumps. One midfielder steps to the carrier while a wide center-back fills the lane behind.
Rafael Benítez — elite set-piece zoning
Benítez built roles for first contact and compact second-phase control. That attention to detail won crucial duels.
- Key insight: these coaches set roles by space and opposition reference points, not just by who is nearest.
| Coach | Core tweak | Match effect |
|---|---|---|
| Diego Simeone | Low 4-4-2 block; narrow mids | Forces play wide; protects centre |
| José Mourinho | Zonal back line + double pivot | Controlled presses; safer offsides |
| Antonio Conte | Back five with opposition jumps | Neutralizes key carriers; fills lanes |
| Rafael Benítez | Detailed zonal set-piece roles | First-contact wins; tidy second-phase |
Strengths, Weaknesses, and Common Pitfalls
Every defensive system has trade-offs — here are the clear gains and risks when you choose space over shadowing opponents.
Pros: The biggest strength is compactness. You create fewer gaps for line-breaking passes and you get clearer first-contact duels on deliveries. That helps win second phases and reduce high-quality chances inside the area.
Cons: Attackers can build momentum with a running start. A late step often hands the opponent the most dangerous chance. Blindside runs are classic pitfalls; they exploit the brief split between adjacent areas.
Avoiding confusion at zone borders
Set clear reference points so two players don’t both leave the same runner. Communication is non-negotiable: every player must talk, adjust, and move with the line.
- Big pro: compactness and clearer first contacts on deliveries.
- Big con: attackers attacking at speed can beat timing and create chances.
- Scan constantly to stop blindside runs and overloads.
- Define who claims first contact to avoid zone-border confusion.
- Train cues: when to step, when to hold, who passes runners on.
| Aspect | Benefit | Risk |
|---|---|---|
| Compact unit | Fewer gaps for through balls | Requires constant focus to keep shape |
| First-contact focus | Better control of set-piece second phases | Late timing concedes easy headers |
| Space control | Denies central lanes | Multiple attackers can overload a zone |
soccer zonal marking explained for Coaches: Training Plans and Grassroots Tips
Coaches: here’s a short, usable plan to train zones, communication, and first‑contact habits fast.
Teaching the concept: communication, roles, and repetition over time
Start with clear language. Define each role and the space it owns on the pitch.
Use short reps. Repeat the same drill until players react without thinking.
Grassroots corner setup: posts, six-yard line, edge of the D, and an out ball
Try a full zonal corner: two on the posts, three along the six‑yard line, three just in front, one on the edge of the D, plus an out ball upfield.
Zone players move forward into the ball’s space, keeping the keeper free to claim. A hybrid variant has one key defender track the main aerial threat.

Progressions: full zonal, then hybrid with key aerial matchups
- Start simple: define zones, assign roles, and repeat—players improve fast with clear practice.
- Teach forwards to attack into their area, not sideways into teammates, so the goalkeeper’s lane stays clean.
- Use short, focused reps: first‑contact headers, second‑ball reactions, and quick outlets into areas pitch that relieve pressure.
- Over time, add hybrid steps where one defender follows the main aerial threat while the rest hold zones.
| Practice focus | Reps | Expected result |
|---|---|---|
| First contact headers | 6–8 short sets | Cleaner clearances |
| Second‑ball reactions | 6 sets | Faster counters |
| Hybrid marking | 4–6 reps vs aerial targets | Neutralize key threats |
Why it works: using zonal marking early builds habits. With steady practice and clear coaching, your team will defend set moments with less panic. That discipline grows confidence in the beautiful game.
Conclusion
Want to win the small battles that decide matches? Zonal defending gives teams a smart way to control key areas on the pitch and read the game together. It is a practical strategy you can teach at any level.
Each player scans the play, meets the opponent when needed, and moves as a unit. In open play protect the middle first; on set pieces own the six‑yard box and attack the ball.
Your team does not need elite size or speed to benefit. Clear roles, compact movement, and repetition build confidence for defenders and every player ahead of them.
Blend hybrid tools against specific threats, then return to the base principles. Using zonal marking turns chaos into structure—and that is how you win moments on the pitch.

